Home improvement does not have to mean tearing down walls, hiring a contractor, or spending thousands of dollars.
Some of the most noticeable changes come from simple DIY projects: painting a room, updating old hardware, adding better lighting, improving storage, or refreshing a tired entryway.
The best DIY home improvement ideas solve a real problem while making your home look cleaner, brighter, and more intentional. They can help you work with what you already have instead of replacing everything.
Whether you are refreshing a rental, preparing your home for guests, improving curb appeal, or simply making your space feel more comfortable, these affordable projects can create a surprisingly big difference.
Start with one room or one weekend project. Small upgrades become much more manageable when you do not try to transform the entire house at once.
Before You Start a DIY Home Improvement Project
A little preparation can prevent wasted money, unfinished projects, and frustrating mistakes.
Before buying supplies:
- Measure the space carefully.
- Set a realistic budget.
- Decide whether the project needs special permits.
- Check whether electrical or plumbing work requires a professional.
- Make a complete materials list.
- Test paint colors and finishes before covering a large area.
- Protect floors and furniture.
- Read product instructions.
- Allow extra time for drying, curing, and unexpected problems.
Keep safety in mind. Turn off electricity before working near switches or light fixtures, wear eye protection when drilling or cutting, and avoid structural, electrical, gas, or major plumbing projects unless you have the proper training.
Helpful DIY starter kit: Check home improvement tool sets on Amazon
1. Paint the Walls for an Instant Room Refresh
Painting is one of the fastest ways to change how a room feels.
A fresh coat can brighten a dark room, cover marks, make old walls look cleaner, and create a more modern atmosphere. Warm whites, soft beige, muted green, light gray, and dusty blue are popular choices because they work with many decorating styles.
Before painting, fill nail holes and small cracks. Lightly sand rough patches, wipe away dust, and use painter’s tape around trim, switches, and windows.
Do not choose a color based only on a small digital sample. Paint a test patch and look at it during the morning, afternoon, and evening. Natural and artificial light can make the same paint color look completely different.
For a polished finish:
- Prepare the walls properly.
- Use primer where needed.
- Cut in around edges with a brush.
- Apply paint with a roller.
- Allow the first coat to dry.
- Add a second coat for even coverage.
Painting essentials: View paint roller kits on Amazon
2. Create an Accent Wall
If repainting an entire room feels like too much work, focus on one wall.
An accent wall adds color, depth, and personality without overwhelming the space. It works especially well behind a bed, sofa, dining table, television, or home-office desk.
You can create an accent wall using:
- Paint
- Peel-and-stick wallpaper
- Wood slats
- Board and batten
- Picture-frame molding
- Shiplap panels
- Geometric painter’s-tape designs
Choose a wall that naturally draws attention. Avoid selecting a wall crowded with doors, windows, or large pieces of furniture unless the layout still feels balanced.
Peel-and-stick wallpaper is particularly useful for renters or anyone who enjoys changing styles frequently. Test a small piece first because adhesion can vary depending on the wall texture and paint finish.
Easy wall upgrade: Check peel-and-stick wallpaper on Amazon
3. Update Cabinet Hardware
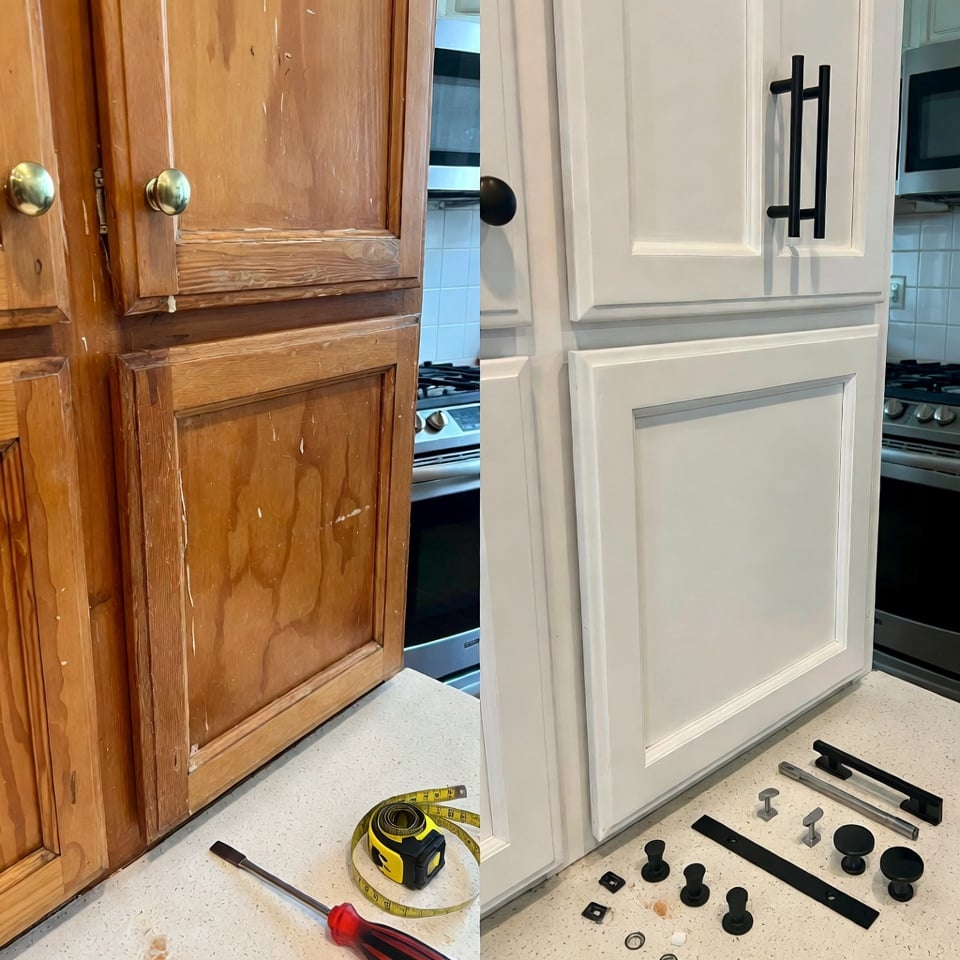
Old cabinet knobs and handles can make a kitchen or bathroom feel dated, even when the cabinets themselves are still in good condition.
Replacing the hardware is a simple project that usually requires only a screwdriver and careful measuring.
Popular finishes include:
- Matte black
- Brushed brass
- Satin nickel
- Antique bronze
- Polished chrome
Before ordering new handles, measure the distance between the existing screw holes. Choosing hardware with the same hole spacing will help you avoid drilling new holes or filling old ones.
Keep the finish consistent throughout the room for a more intentional look. You can also coordinate cabinet hardware with faucets, lighting, towel bars, or appliance finishes.
Quick cabinet makeover: View cabinet handles and knobs on Amazon
4. Paint Kitchen or Bathroom Cabinets
If your cabinets are sturdy but look worn or outdated, painting them may be much cheaper than replacing them.
Cabinet painting takes more preparation than painting a wall, so do not skip the cleaning and sanding steps. Grease, soap residue, and glossy finishes can prevent paint from sticking properly.
A basic cabinet-painting process includes:
- Remove doors, drawers, and hardware.
- Label each piece.
- Clean all surfaces thoroughly.
- Sand or use a suitable deglosser.
- Apply bonding primer.
- Use cabinet-grade paint.
- Allow each coat to cure properly.
- Reinstall doors and hardware.
White and cream create a bright classic look. Deep green, navy, charcoal, and muted blue can make cabinets feel more dramatic and expensive.
Avoid rushing to reinstall the doors while the paint is still soft. Cabinet paint may feel dry before it has fully cured.
5. Install Peel-and-Stick Backsplash Tiles
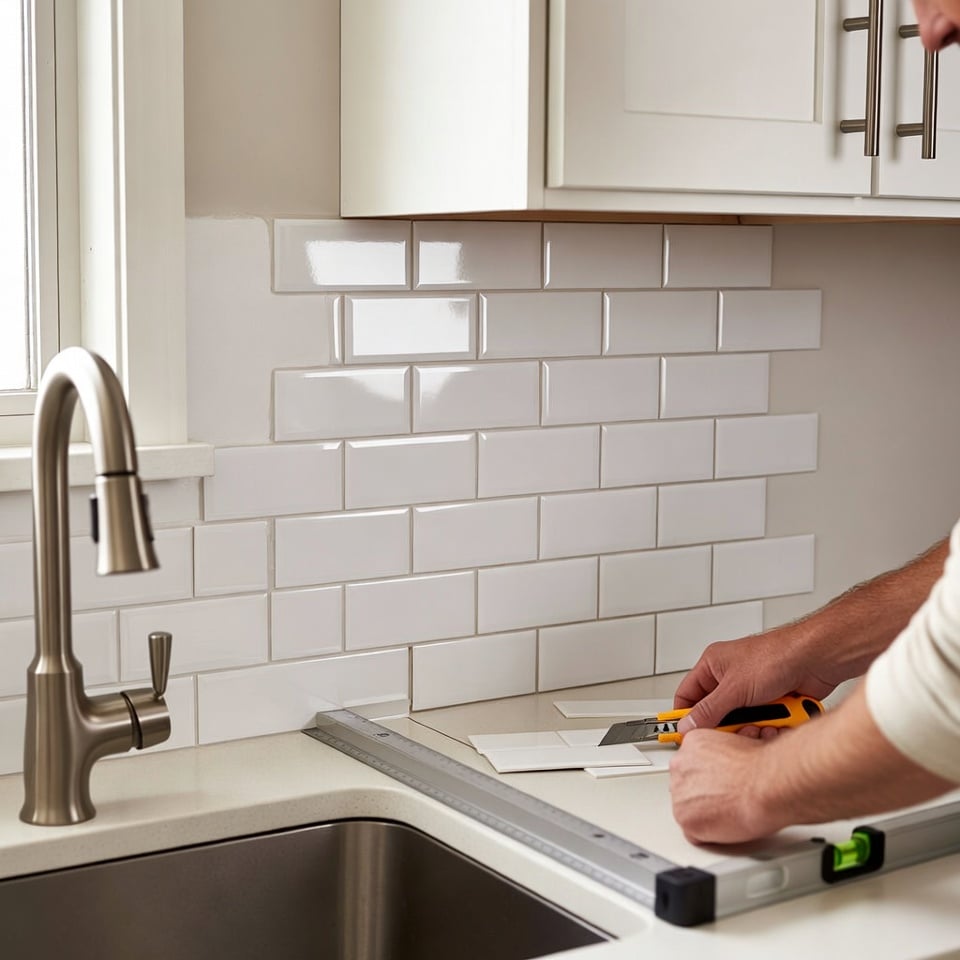
A backsplash can make a kitchen or bathroom look more finished.
Peel-and-stick tiles are a beginner-friendly alternative to traditional tile because they do not require mortar or grout. They work well for small areas, rentals, laundry rooms, and quick cosmetic updates.
Before applying them:
- Clean and dry the wall.
- Remove grease and dust.
- Measure the area carefully.
- Mark a straight starting line.
- Plan the layout before peeling the backing.
- Use a sharp utility knife for clean cuts.
Subway tile, marble-look patterns, geometric designs, and neutral stone effects can create a polished appearance.
Apply peel-and-stick products only to smooth, suitable surfaces. Areas exposed to high heat, constant moisture, or damaged walls may need a more permanent material.
DIY backsplash option: Check peel-and-stick backsplash tiles on Amazon
6. Replace Old Light Fixtures
Lighting affects how every color, surface, and piece of furniture looks.
A dated ceiling fixture can make the entire room feel older. Replacing it with a simple modern fixture may completely change the space.
Consider:
- Pendant lights above an island
- Flush-mount lights for low ceilings
- Wall sconces beside a mirror
- A statement fixture above the dining table
- Under-cabinet lighting in the kitchen
- Motion-sensor lighting in closets
Use bulbs with a consistent color temperature. Warm white lighting creates a cozy feeling, while cooler light can feel cleaner and more energizing in workspaces.
Electrical work can be dangerous. Turn off the circuit at the breaker and confirm that the power is off before touching wires. Hire a licensed electrician when you are uncertain about the wiring or local requirements.
Simple lighting upgrade: Browse modern ceiling light fixtures on Amazon
7. Add Under-Cabinet Lighting
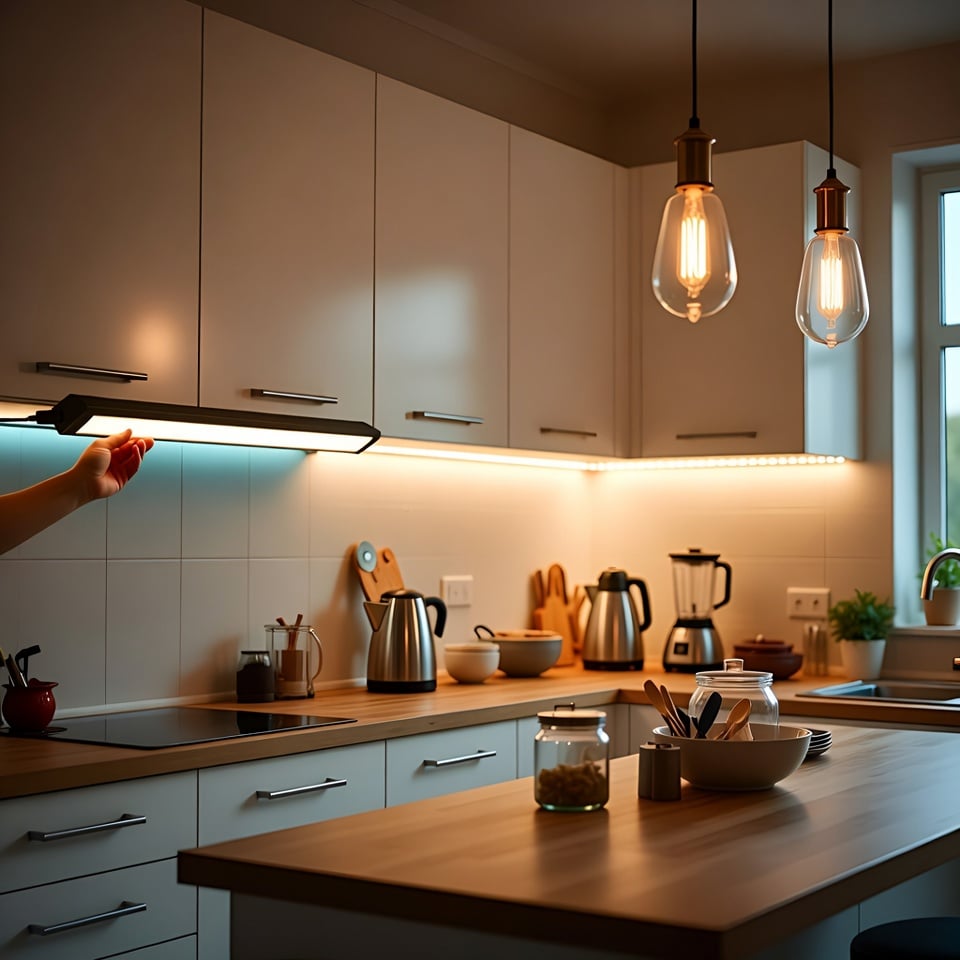
Under-cabinet lighting makes kitchens look more expensive while improving visibility for food preparation.
You can choose:
- Plug-in light bars
- Rechargeable LED strips
- Battery-operated puck lights
- Motion-sensor lights
- Hardwired fixtures
Rechargeable and adhesive options are useful when you do not want to modify wiring.
Place the lights toward the front of the cabinet rather than directly against the wall. This distributes light more evenly across the counter.
Hide visible cords with small cable clips or covers. Messy wiring can take away from the finished look.
Under-cabinet lights can also work inside closets, beneath shelves, along stairways, or inside dark storage cabinets.
Easy lighting solution: View rechargeable under-cabinet lights on Amazon
8. Add Board and Batten to a Plain Wall
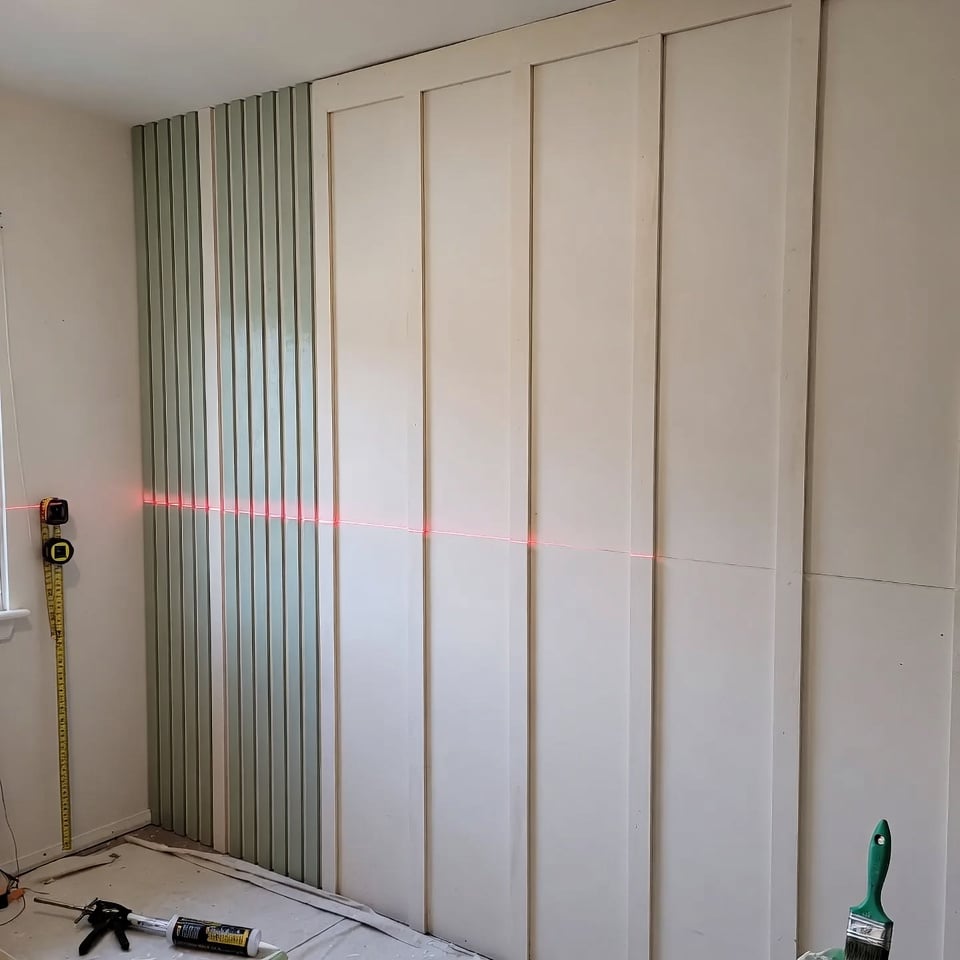
Board and batten gives plain walls architectural detail and can make a room look custom-built.
It works beautifully in:
- Entryways
- Dining rooms
- Bedrooms
- Hallways
- Bathrooms
- Staircases
- Home offices
You can install it across the entire wall or only on the lower portion.
A simplified approach uses thin wood or MDF strips attached to the wall in a measured pattern. Fill the nail holes, caulk the edges, prime, and paint everything the same color.
Measure carefully before cutting. Uneven spacing is much more noticeable once the boards are installed.
In moisture-prone rooms, choose materials and paint designed for humid conditions.
For clean measurements: Check laser levels on Amazon
9. Replace Worn Bathroom Caulk
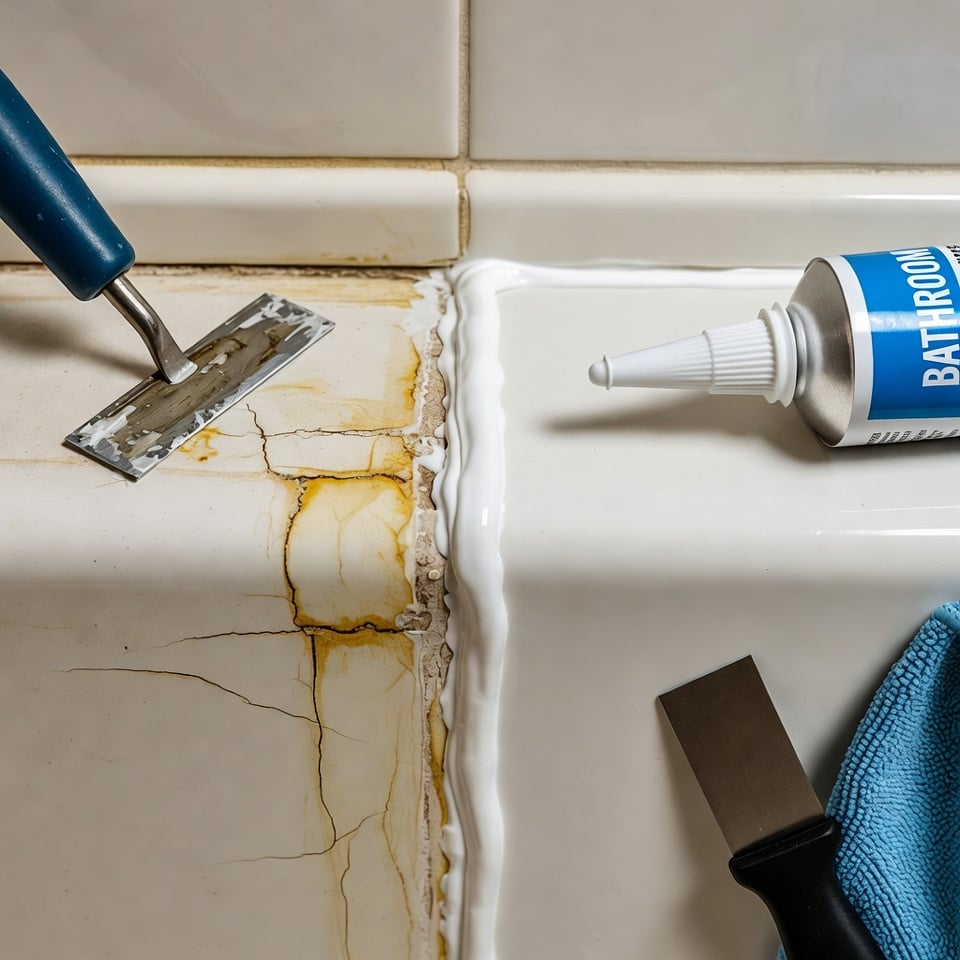
Old caulk can make a bathroom look dirty even after it has been cleaned.
Cracked, peeling, stained, or missing caulk around a tub, shower, sink, or backsplash should be replaced to improve appearance and help prevent water from entering gaps.
Remove the old caulk completely with a scraper or caulk-removal tool. Clean the area, treat visible mildew appropriately, and allow everything to dry.
Apply a smooth bead of bathroom-grade waterproof caulk. Use a caulking tool or damp finger to create a neat line, following the product instructions.
Do not use the shower or expose the area to water until the caulk has cured.
Persistent mold, soft walls, loose tiles, or water damage may indicate a deeper moisture problem that needs professional attention.
Helpful bathroom repair: View caulk-removal and finishing tools on Amazon
10. Upgrade Interior Doors With Paint and New Handles
Interior doors take up a large amount of visual space, but they are often overlooked.
Painting a yellowed, scratched, or plain door can instantly improve a hallway or room. White feels fresh and classic, while black, charcoal, deep green, or muted blue can create a bold designer look.
You can also update:
- Door handles
- Hinges
- Doorstops
- Closet-door pulls
- Strike plates
Before painting, clean the door and sand rough areas. Remove the hardware or protect it carefully with tape.
Paint the edges, panels, and flat areas in a logical order to reduce drips and brush marks.
A new lever-style handle can make an inexpensive hollow-core door look more modern.
Door makeover option: Check interior door handles on Amazon
11. Build Simple Floating Shelves
Floating shelves add storage without taking up floor space.
They are useful in kitchens, bathrooms, living rooms, bedrooms, laundry rooms, and small entryways.
Use them to display:
- Books
- Baskets
- Plants
- Framed photographs
- Spices
- Towels
- Toiletries
- Decorative objects
The most important part is secure installation. Locate wall studs when possible, or use anchors rated for the wall material and expected weight.
Do not overload decorative shelves. Heavy books, appliances, and breakable objects need stronger brackets and proper support.
For a balanced look, leave some empty space instead of filling every inch.
Simple storage upgrade: View floating wall shelves on Amazon
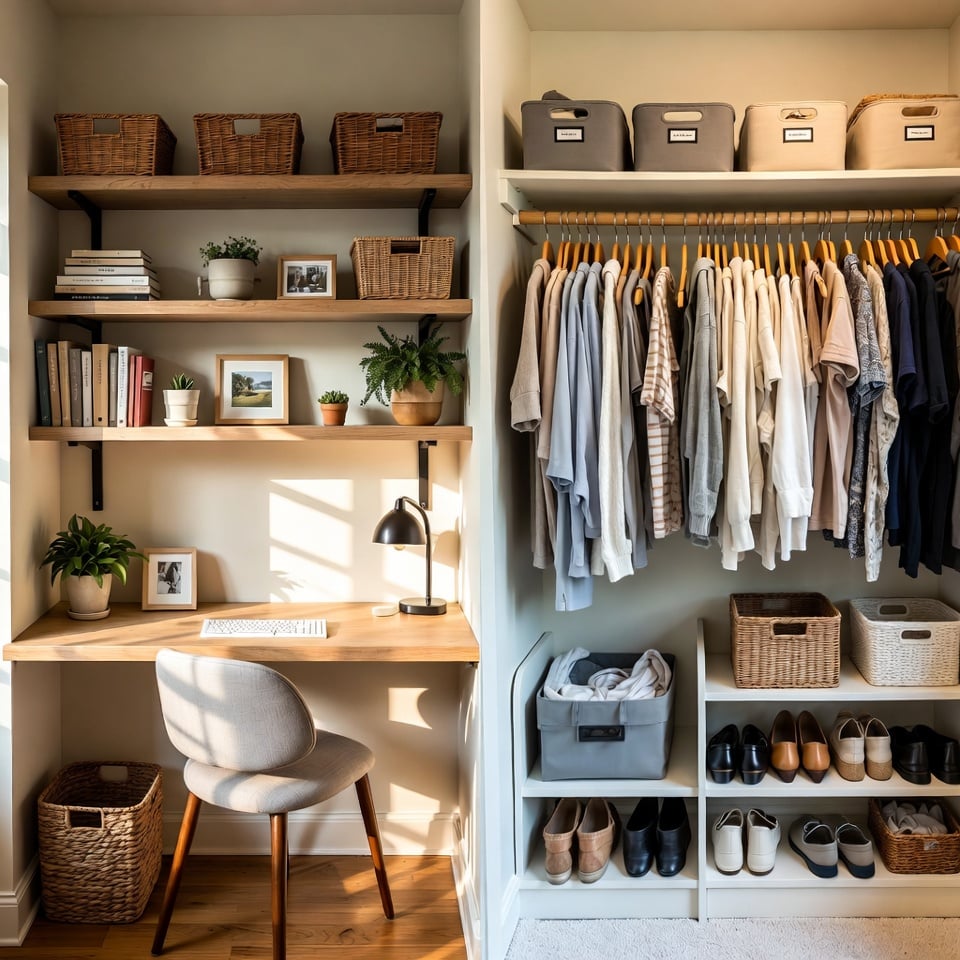
12. Improve Closet Storage
A better closet system can make a small space feel much larger.
Begin by removing items you no longer wear or use. Storage products will not solve overcrowding if the closet simply contains too much.
Then add practical organizers such as:
- Slim hangers
- Shelf dividers
- Over-the-door hooks
- Shoe racks
- Hanging organizers
- Storage bins
- Drawer units
- A second clothing rod
Keep everyday items at eye level, less-used items on higher shelves, and heavier objects near the floor.
Use matching baskets or labels to create a cleaner appearance. Clear containers are useful when you need to see what is inside.
Closet organization option: Check adjustable closet organizers on Amazon
13. Refresh the Front Door
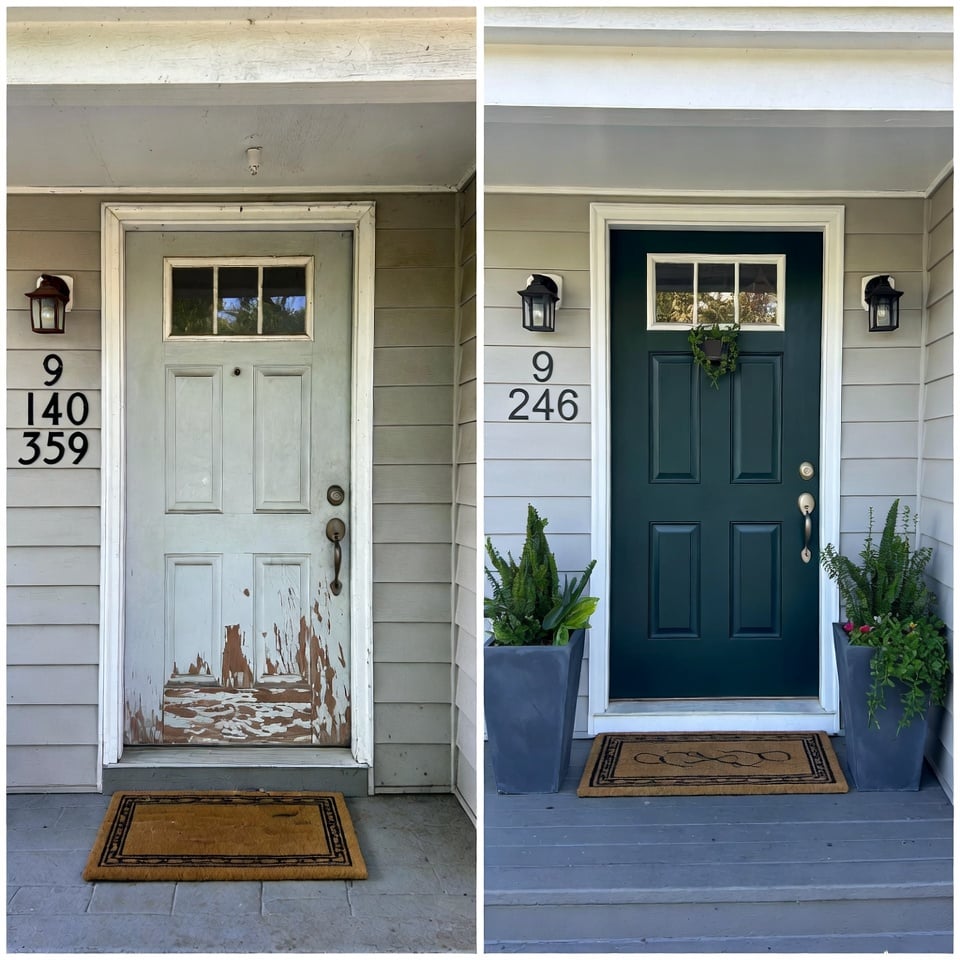
Your front door is one of the first things people notice about your home.
A fresh coat of paint can make the entire exterior feel more welcoming. Classic choices include black, navy, deep green, red, warm gray, and natural wood-inspired finishes.
Complete the makeover by updating:
- Door hardware
- House numbers
- Doormat
- Porch light
- Planters
- Door knocker
- Mailbox
Use exterior paint designed for the door material and weather conditions. Clean and prepare the surface properly before painting.
Choose a color that works with the siding, brick, roof, and trim instead of selecting a shade in isolation.
Quick curb-appeal upgrade: View modern house numbers on Amazon
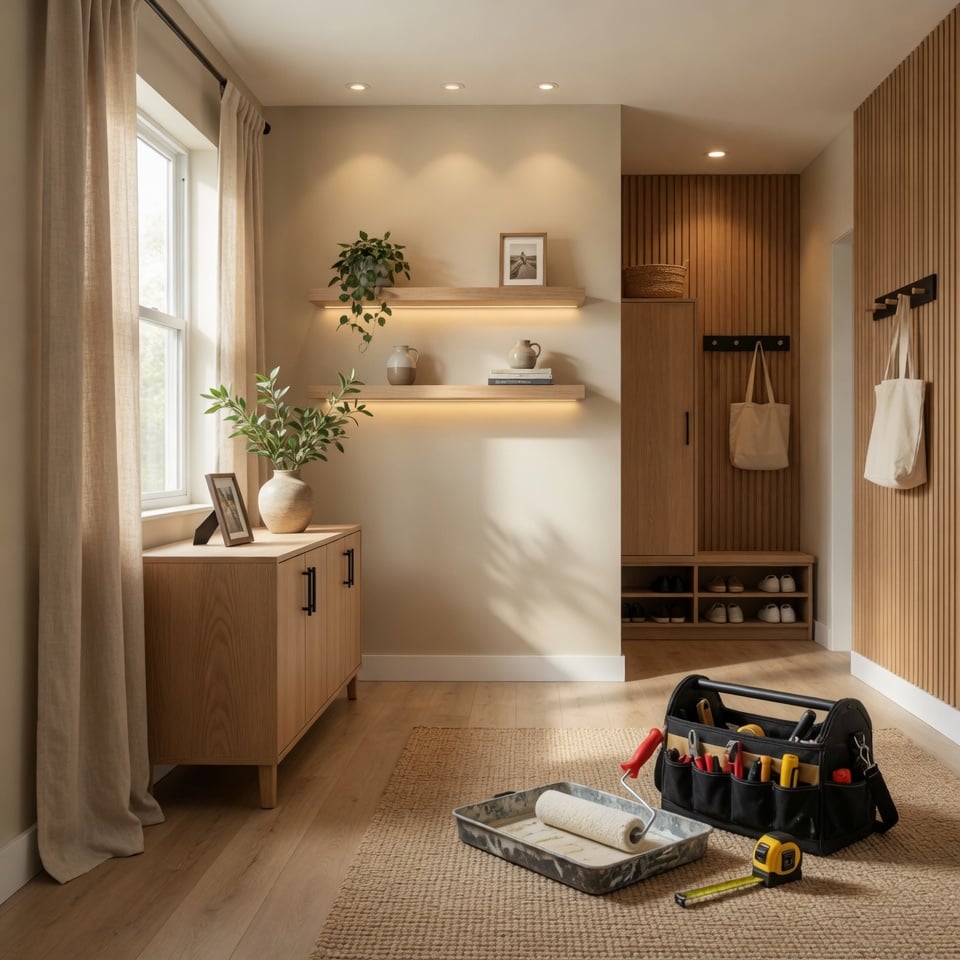
14. Install a Simple Wall-Mounted Entryway Organizer
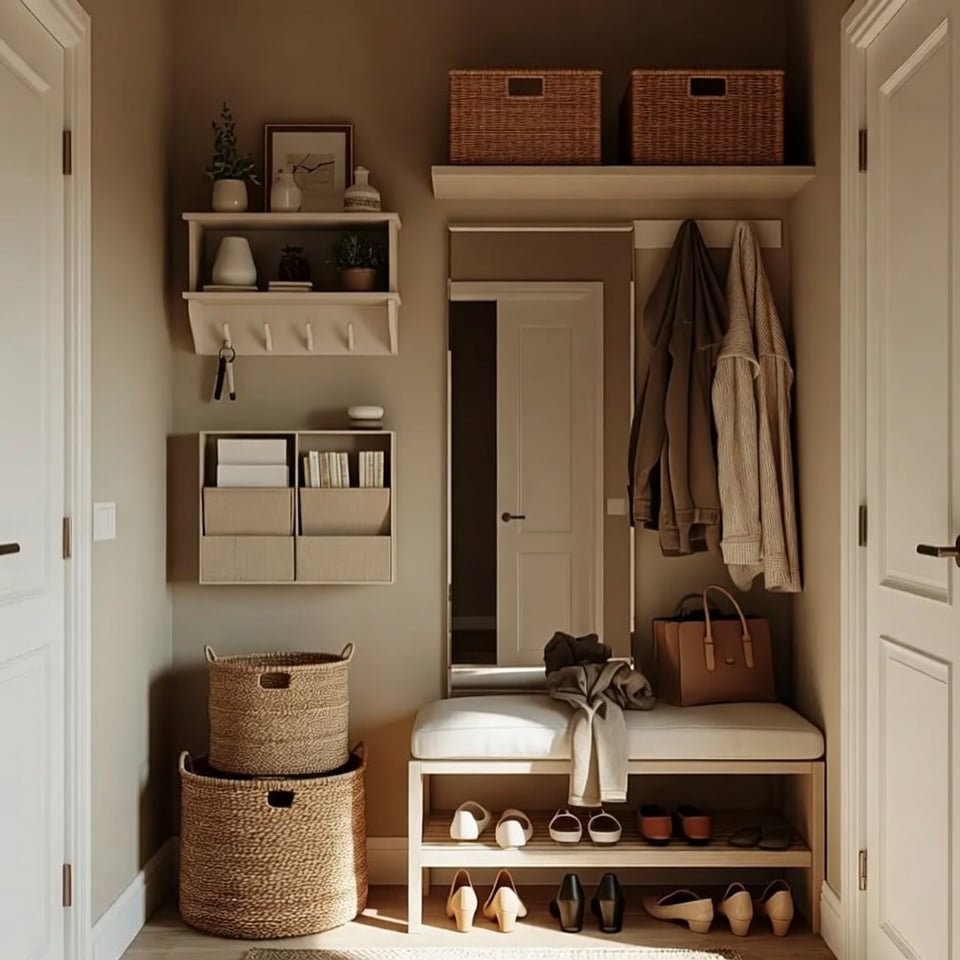
An organized entryway prevents shoes, keys, coats, bags, and mail from spreading through the house.
Even a narrow wall can hold a practical drop zone.
Combine:
- Wall hooks
- A key shelf
- Small baskets
- A mirror
- A shoe rack
- A narrow bench
- A mail organizer
Mount hooks securely at a comfortable height. Consider lower hooks for children so they can put away their own backpacks and jackets.
A small shelf with hooks underneath can provide storage without making the entryway feel crowded.
Use one basket for items that need to leave the house, such as returns, library books, or reusable shopping bags.
Entryway solution: Check wall-mounted entryway organizers on Amazon
15. Update Window Treatments
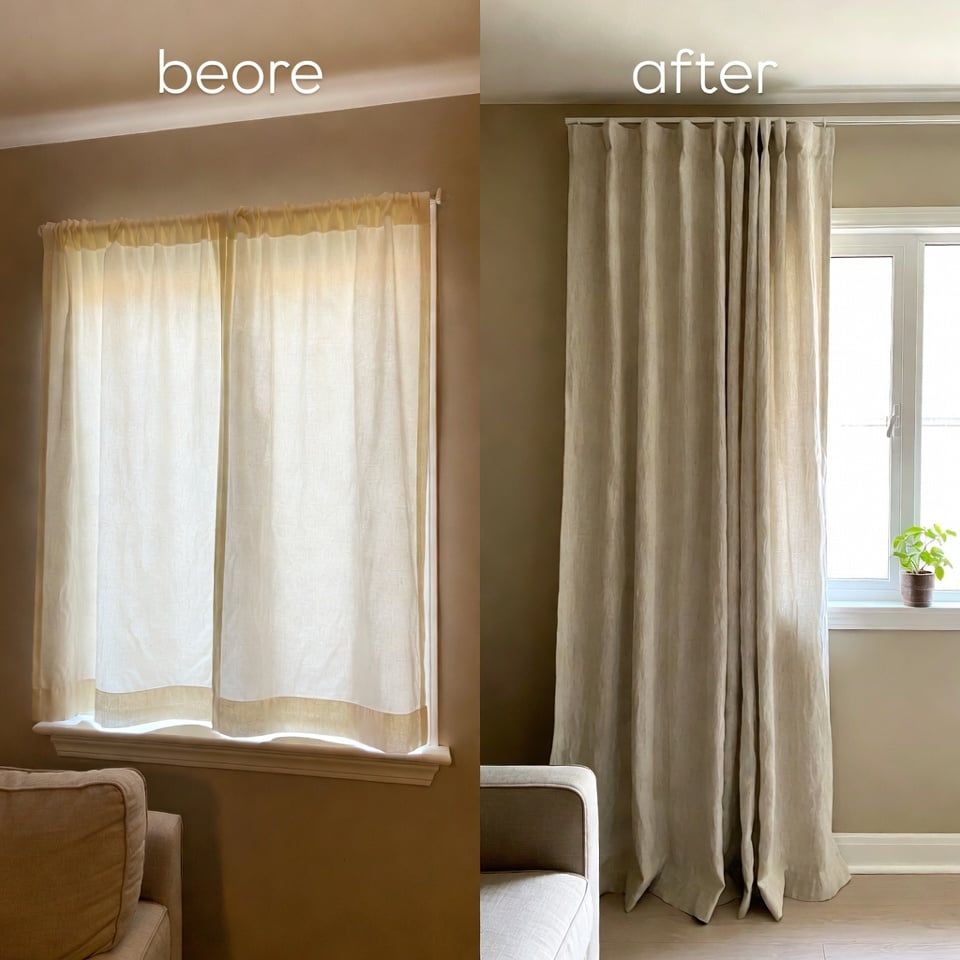
Old, short, or poorly fitted curtains can make a room feel smaller.
For a taller, more polished appearance, hang the curtain rod several inches above the window and extend it beyond the sides. Curtains should usually reach the floor or end deliberately at the windowsill, rather than stopping at an awkward point.
Choose curtains based on the room’s needs:
- Sheer curtains for filtered natural light
- Blackout curtains for bedrooms
- Linen-look curtains for a relaxed style
- Thermal curtains for additional insulation
- Moisture-resistant shades for bathrooms
Use a rod wide enough for the curtains to sit mostly outside the window when open. This allows more daylight into the room.
Steam or iron creased curtains after installation. Wrinkled fabric can make even expensive curtains look unfinished.
Window update: Browse floor-length curtain panels on Amazon
Budget-Friendly DIY Home Improvement Ideas Under $100
Many home upgrades can be completed without a large renovation budget.
Affordable projects include:
- Painting one accent wall
- Replacing cabinet knobs
- Installing a new showerhead
- Adding rechargeable under-cabinet lighting
- Replacing switch plates
- Painting the front door
- Adding peel-and-stick wallpaper
- Installing wall hooks
- Updating bathroom caulk
- Adding drawer organizers
- Replacing worn doormats
- Installing floating shelves
- Adding solar pathway lights
- Updating house numbers
- Painting old furniture
Prices vary depending on the materials and size of the project, but focusing on one visible area can create a bigger impact than buying many small decorative items.
Easy Weekend Home Improvement Projects
These projects can often be completed over a weekend:
Saturday morning
- Gather supplies.
- Protect floors and furniture.
- Remove hardware.
- Clean and prepare surfaces.
Saturday afternoon
- Paint the first coat.
- Install shelves or organizers.
- Replace handles and small fixtures.
Sunday morning
- Apply the final paint coat.
- Complete touch-ups.
- Reinstall hardware.
Sunday afternoon
- Clean the work area.
- Style the finished space.
- Return furniture and accessories.
Avoid planning several messy projects at once. One completed improvement feels much better than five half-finished projects.
DIY Home Improvements That Add Curb Appeal
To improve the outside of your home, focus on visible maintenance and a welcoming entrance.
Try:
- Painting the front door
- Cleaning the walkway
- Adding large planters
- Updating house numbers
- Installing solar lights
- Repainting porch railings
- Power-washing suitable surfaces
- Repairing loose edging
- Adding fresh mulch
- Cleaning exterior light fixtures
- Replacing an old mailbox
- Trimming overgrown shrubs
A clean, well-maintained exterior usually creates more impact than adding many decorative items.
Common DIY Home Improvement Mistakes
Skipping preparation
Paint and adhesive products will not perform properly on dirty, greasy, damp, or damaged surfaces.
Measuring only once
Double-check every measurement before cutting, drilling, or ordering materials.
Choosing style over function
A beautiful product is not helpful if it cannot handle moisture, heat, weight, or daily use.
Buying the cheapest tools available
An inexpensive tool may be fine for a small job, but weak blades, inaccurate levels, or poor-quality brushes can make the project more difficult.
Ignoring safety
Wear appropriate protection and know when a job requires a licensed professional.
Starting too many projects
Complete one space before beginning another. Constant unfinished work can make your home feel more stressful rather than improved.
When to Call a Professional
Some home improvements are better left to experienced professionals.
Get qualified help for:
- Major electrical work
- Gas lines
- Structural changes
- Foundation problems
- Roof repairs
- Extensive plumbing work
- Serious water damage
- Mold covering a large area
- Asbestos or lead concerns
- Removing load-bearing walls
- Installing large windows or exterior doors
A professional may cost more initially, but mistakes in these areas can be dangerous and expensive to repair.
Frequently Asked Questions
What is the easiest DIY home improvement project?
Painting a wall, replacing cabinet hardware, adding wall hooks, and updating curtains are among the easiest beginner-friendly projects. They require few tools and can create a noticeable change.
What home improvements make the biggest difference?
Fresh paint, improved lighting, updated hardware, clean flooring, organized storage, and a refreshed entrance usually create the biggest visual impact for the cost.
How can I make my house look expensive on a budget?
Use consistent finishes, hang curtains higher, replace dated hardware, remove clutter, improve lighting, add simple wall molding, and choose a calm color palette. Careful installation matters more than buying the most expensive materials.
What tools should every DIY beginner own?
A basic toolkit should include a tape measure, hammer, screwdrivers, utility knife, adjustable wrench, level, pliers, drill, drill bits, safety glasses, and a small step ladder.
Should I renovate one room at a time?
Yes. Completing one room helps you control costs, reduce disruption, and learn from each project before moving to the next area.
Can renters make DIY home improvements?
Renters can use removable wallpaper, freestanding shelves, adhesive lighting, tension rods, temporary backsplash products, rugs, curtains, and removable hooks. Always check the lease and request permission before making permanent changes.
What should I renovate first in an older home?
Start with safety and maintenance problems such as leaks, faulty wiring, damaged roofing, moisture, and structural issues. Cosmetic updates should come after the home is safe and dry.
Final Thoughts
DIY home improvement does not require a complete renovation.
A freshly painted room, modern cabinet handles, better lighting, organized storage, new caulk, or a refreshed front door can make your home feel cleaner and more valuable without creating a huge expense.
Begin with the project that solves the most frustrating problem in your home. Prepare carefully, use the right materials, and finish one task before moving to the next.
Small improvements may not feel dramatic while you are working on them, but together they can completely change how your home looks and functions.