
Sugaring is an ancient hair removal method that has been practiced for centuries, notably in ancient Egypt, where it was the primary technique for hair removal.
Compared to traditional waxing, sugaring is often considered less painful, less irritating, and more moisturizing, making it particularly suitable for individuals with sensitive skin or those prone to ingrown hairs.
Advantages of Sugar Wax


Sugar wax is an all-natural solution composed of sugar, water, and lemon juice. The benefits of using sugar wax include:
– Gentler on the Skin: Sugar wax tends to be less painful and more gentle than traditional wax, reducing the likelihood of skin irritation.
– Easy Cleanup: Since sugar wax is water-soluble, it can be easily washed off with warm water, making the cleanup process simpler than that of traditional waxing methods.
– Long-Term Benefits: Regular use of sugar wax can lead to thinner and slower hair regrowth over time, providing a more effective long-term solution for hair removal.
– Cost-Effective: Making your own sugar wax at home can be more economical compared to visiting a salon for professional waxing services.
Making DIY Sugar Wax


Ingredients for DIY Sugar Wax
Creating your own sugar wax at home is simple and requires just three ingredients:
– 1 cup of white sugar
– 1/8 cup of lemon juice (alternatively, you can use apple cider vinegar)
– 1/8 cup of warm water
Instructions for Making Sugar Wax
1. Combine Ingredients: In a medium-sized pot, combine the white sugar, lemon juice (or apple cider vinegar), and warm water.
2. Heat Mixture: Place the pot on the stove over high heat. Stir the mixture frequently to prevent it from burning.
3. Adjust Temperature: Once the mixture begins to bubble, reduce the heat to medium. Continue stirring regularly.
4. Check Consistency: Monitor the mixture until it turns a golden brown color. The ideal consistency should resemble hot syrup. If it becomes thick like honey, it may not adhere well to the skin, so continue heating until you reach the desired texture.
5. Cool the Wax: Carefully transfer the mixture to a bowl and allow it to cool for approximately 30 minutes. The wax should remain warm yet manageable for application.
Expert Tip
Using white sugar is preferable over brown sugar for this sugar paste. White sugar allows for better visibility of color changes during cooking and has a slower hardening process, making it easier to work with.
Skin Preparation Before Sugaring
For optimal results, ensure your hair is between one-fourth to three-fourths of an inch long. If your hair exceeds this length, consider trimming it beforehand.
– Pain Management: If you’re concerned about discomfort during the process, dermatologist Dr. Hadley King suggests taking an over-the-counter pain reliever, such as ibuprofen. Additionally, applying a cold pack to the skin beforehand can help numb the area.
– Cleansing the Skin: It’s essential to clean the area where you will be applying the sugar wax. Use a gentle soap to cleanse the skin and lightly exfoliating beforehand.
– Avoiding Lotions and Oils: Both experts emphasize that the area must be free from lotions and oils. If your skin tends to be oily, consider using a body wipe or witch hazel to remove excess oil.
– Precautions: If your skin is sunburned, irritated, or has open sores, avoid sugaring these areas. Furthermore, discontinue the use of oral or topical acne treatments and retinoids at least six days prior to sugaring to minimize the risk of irritation.
How to Use Your DIY Sugar Wax

DIY sugar wax is a versatile hair removal option that can be safely applied to various areas of the face and body, provided the hair length is at least one-quarter inch.
This method is not only cost-effective—utilizing ingredients you likely already have at home—but also eliminates the need for cloth strips, though you can use them if preferred.
However, it’s essential to be aware that sugar waxing can be somewhat painful.
Steps to Apply Sugar Wax
Follow these steps for effective sugar waxing:
1. Test the Temperature: Before application, test a small amount of sugar wax on the inside of your wrist. It should feel warm but not painful or burning.
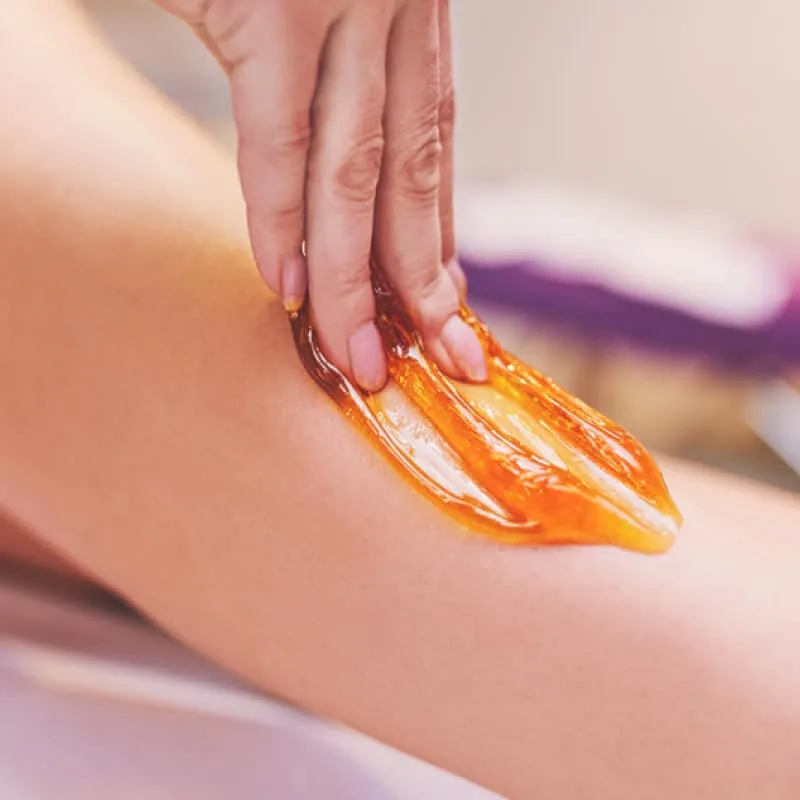
2. Apply the Sugar: Spread the sugar wax onto a small section of skin in the direction of hair growth.
3. Use a Cloth Strip (Optional): Place a cloth strip over the sugar and press down firmly, or simply press down on the sugar to create a thin strip.
4. Remove the Sugar: After a few seconds, hold your skin taut and quickly remove the cloth strip in the opposite direction of hair growth. If you’re not using a cloth, pull on the wax directly.
5. Soothe the Skin: After waxing, apply cold packs to soothe the skin, and follow up with a moisturizer.
Areas Suitable for Sugar Waxing
Sugaring can be performed on any body area with unwanted hair, including:
– Arms
– Underarms
– Back
– Bikini area
– Upper lip
– Face
– Legs
Who Should Avoid Sugar Waxing
There are certain conditions under which you should avoid sugar waxing. Dr. King advises against using sugar paste on:
– Sunburned skin
– Very sensitive or inflamed skin
– Skin treated with Isotretinoin in the last six months
– Areas with open sores, rashes, bruises, swelling, or cold sores
Potential risks associated with sugar waxing include burns from heated paste, irritation, folliculitis, and ingrown hairs.
Is Sugar Waxing Better than Traditional Waxing?
Sugar waxing is generally easier to do at home, requiring minimal supplies. The technique is often considered less irritating and more moisturizing compared to traditional waxing.
Ultimately, it depends on personal preference and what works best for your skin type and needs.
Aftercare Recommendations
Following the sugaring process, it’s essential to remove any wax residue. Use a skin wax remover or warm water with a washcloth.
For enhanced healing, apply antiseptic cream for one to two days post-sugaring. Gallo suggests using coconut oil to counteract the acidity of the lemon juice and to soothe the skin.
If sugaring sensitive areas like the bikini line or underarms, it’s advisable to avoid strenuous workouts and hot baths immediately afterward.
The Takeaway
Sugaring is a gentle alternative to traditional waxing that is often less painful and more moisturizing.
Made from just three ingredients—sugar, water, and lemon juice—it can be easily prepared at home.
However, caution is necessary when boiling the sugar wax to prevent burns.
If you’re unsure or this is your first experience with sugaring, consulting a licensed professional for hair removal is always the safest option.
Frequently Asked Questions
How long does sugar wax last?
Results can last approximately five to six weeks, depending on individual hair growth rates.
Is sugar waxing better than shaving?
Sugaring typically lasts longer than shaving and can lead to reduced hair growth over time since it removes hair from the root.
However, shaving is generally quicker and less painful, so it’s a matter of personal preference.
Can you shower after sugaring?
Yes, showering is fine after sugaring, but it’s best to avoid the gym, saunas, hot tubs, and skin-to-skin contact for 24 to 48 hours.
What are the downsides to sugaring?
Common downsides may include irritation and redness at the site of waxing. It can also be painful and may take longer than shaving.
Can I sugar wax my pubic area?
Yes, sugaring can be safely performed in the bikini area.

